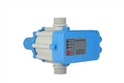
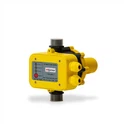
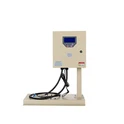
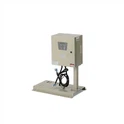
Hey there! As a supplier of Electric Water Pump Controllers, I've got a ton of hands - on experience with these nifty devices. Today, I'm gonna walk you through how to test an electric water pump controller. Whether you're a DIY enthusiast or a professional in the field, this guide will help you ensure your water pump controller is working as it should.
Why Testing is Crucial
First off, you might be wondering why testing an electric water pump controller is so important. Well, these controllers are the brains behind your water pump system. They regulate the flow and pressure of water, making sure everything runs smoothly. A malfunctioning controller can lead to all sorts of problems, like low water pressure, over - pumping, or even pump failure. By testing the controller regularly, you can catch issues early and avoid costly repairs down the line.


Tools You'll Need
Before you start testing, you'll need a few tools. Here's a quick list:
- Multimeter: This is a must - have for measuring voltage, current, and resistance. You can pick one up at your local hardware store for a reasonable price.
- Pressure gauge: To measure the water pressure in the system. Make sure it's compatible with the pressure range of your water pump.
- Screwdriver set: You'll probably need to open up the controller housing, so having a set of different - sized screwdrivers is essential.
Visual Inspection
The first step in testing your electric water pump controller is a visual inspection. Take a good look at the controller for any signs of damage, like cracks in the housing, loose wires, or burnt components. If you notice any of these issues, it's a clear sign that the controller might be faulty.
Check the wiring connections to make sure they're tight and secure. Loose connections can cause intermittent problems and even lead to electrical shorts. Also, look for any signs of corrosion on the terminals, which can affect the performance of the controller.
Testing the Power Supply
Now, let's move on to testing the power supply. This is crucial because if the controller isn't getting the right amount of power, it won't work properly.
- Turn off the power: Before you start working on the controller, make sure to turn off the power at the breaker box. This will prevent any electrical shocks.
- Open the controller housing: Use your screwdriver to open the housing and expose the internal components.
- Locate the power input terminals: These are usually marked on the controller. Use your multimeter to set it to the appropriate voltage range (usually 120V or 240V, depending on your system).
- Measure the voltage: Touch the multimeter probes to the power input terminals. You should get a reading close to the rated voltage of your system. If the reading is significantly lower or higher, there might be an issue with the power supply or the controller itself.
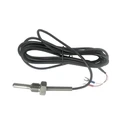
Testing the Pressure Switch
The pressure switch is an important part of the water pump controller. It turns the pump on and off based on the water pressure in the system.
- Re - pressurize the system: Make sure the water pump is turned on and the system is pressurized. You can use your pressure gauge to monitor the pressure.
- Locate the pressure switch: It's usually mounted on the controller or near the water pump.
- Check the switch settings: The pressure switch has two settings: the cut - in pressure (when the pump turns on) and the cut - out pressure (when the pump turns off). These settings are usually adjustable.
- Test the switch operation: As the water pressure in the system changes, the pressure switch should open and close at the appropriate pressures. You can use your multimeter to check the continuity of the switch contacts. When the switch is closed, there should be continuity (low resistance). When it's open, there should be no continuity (high resistance).
Testing the Control Circuit
The control circuit of the electric water pump controller is responsible for regulating the pump's operation. It includes components like relays, capacitors, and resistors.
- Check the relay operation: Relays are used to control the flow of electricity in the circuit. You can use your multimeter to check if the relay is switching properly. When the relay is energized, it should make a clicking sound and the contacts should close.
- Test the capacitors: Capacitors store and release electrical energy. A faulty capacitor can cause the pump to run inefficiently or not at all. You can use a capacitor tester to check the capacitance of the capacitors. If the reading is outside the specified range, the capacitor needs to be replaced.
- Measure the resistance of resistors: Resistors are used to limit the flow of current in the circuit. Use your multimeter to measure the resistance of the resistors. Compare the readings to the rated values. If the resistance is significantly different, the resistor might be faulty.
Testing with a Load
Once you've tested all the individual components, it's time to test the controller with a load. This means running the water pump and seeing how the controller performs under normal operating conditions.
- Turn on the power: After you've completed all the tests and made any necessary repairs, turn on the power at the breaker box.
- Monitor the pump operation: Observe how the pump starts and stops. The controller should turn the pump on when the water pressure drops below the cut - in pressure and turn it off when the pressure reaches the cut - out pressure.
- Check the water pressure: Use your pressure gauge to make sure the water pressure in the system is within the normal range. If the pressure is too high or too low, there might be an issue with the controller or the water pump.
Troubleshooting Tips
If you encounter any problems during the testing process, here are some troubleshooting tips:
- Check the wiring again: Make sure all the connections are tight and there are no loose wires. Sometimes, a simple loose connection can cause a lot of problems.
- Look for signs of overheating: If any of the components are hot to the touch, it could indicate a short circuit or a problem with the power supply.
- Refer to the manufacturer's manual: The manual usually has a troubleshooting section that can help you diagnose and fix common problems.
Conclusion
Testing an electric water pump controller might seem like a daunting task, but with the right tools and a little bit of know - how, you can do it yourself. Regular testing and maintenance will help ensure that your water pump system runs smoothly and efficiently.
If you're in the market for a new electric water pump controller, we've got you covered. We offer a wide range of high - quality controllers, including the Digital Display Water Pump Pressure Controller, Clean Water Pump Controller, and Electric Water Pump Controller.
If you have any questions or are interested in purchasing our products, feel free to reach out. We're always happy to assist with your water pump controller needs and have in - depth discussions about your specific requirements.
References
- "Water Pump Systems Handbook"
- Manufacturer's manuals for electric water pump controllers