Hey there! As a supplier of water pump pressure tanks, I've seen firsthand how crucial these tanks are for multi - story buildings. In this blog, I'll walk you through the process of installing a water pump pressure tank in a multi - story building.
Why You Need a Water Pump Pressure Tank in a Multi - Story Building
Before we dive into the installation process, let's talk about why you need a water pump pressure tank in a multi - story building. In a multi - story building, maintaining consistent water pressure throughout all floors can be a real challenge. Without a proper pressure tank, you might experience low water pressure on the upper floors or even inconsistent flow.
A water pump pressure tank helps to store water under pressure. When you turn on a faucet or a shower, the pressurized water in the tank is ready to flow, ensuring a steady supply and consistent pressure. It also reduces the frequency of the water pump cycling on and off, which can extend the life of the pump.
Tools and Materials You'll Need
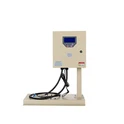
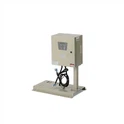
- Water Pump Pressure Tank: Of course, you'll need the right pressure tank for your building. Make sure to choose a tank with the appropriate capacity based on the size of your building and the water demand.
- Pipe Fittings: You'll need various pipe fittings such as elbows, tees, and couplings to connect the tank to the water system.
- Wrenches: A set of wrenches will be essential for tightening the fittings and making secure connections.
- Pipe Sealant: This helps to prevent leaks at the pipe connections.
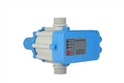
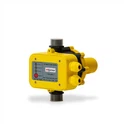
- Pressure Relief Valve: A safety feature that releases excess pressure from the tank.
- Liquid Level Sensor: This can help you monitor the water level in the tank.
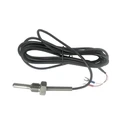
- Temperature Transmitter: Useful for monitoring the temperature of the water in the tank.
- Water Pump Pressure Gauge: To measure the pressure in the tank.
Step - by - Step Installation Guide
Step 1: Choose the Right Location
The first step is to find a suitable location for the water pump pressure tank. It should be placed on a flat, stable surface that can support the weight of the tank when it's full of water. The location should also be easily accessible for maintenance. Avoid placing the tank in areas prone to flooding or extreme temperatures.
Step 2: Prepare the Tank
Before installation, make sure the tank is clean and free of any debris. Check the air pressure in the tank. Most pressure tanks come pre - charged with air, but it's a good idea to double - check and adjust it if necessary. The air pressure should be a few pounds per square inch (psi) lower than the cut - in pressure of the water pump.
Step 3: Connect the Inlet and Outlet Pipes
Start by connecting the inlet pipe from the water source to the tank. Use the appropriate pipe fittings and apply pipe sealant to ensure a leak - free connection. Tighten the fittings using a wrench. Next, connect the outlet pipe from the tank to the building's water distribution system. Again, use pipe sealant and tighten the fittings securely.
Step 4: Install the Pressure Relief Valve
The pressure relief valve is a critical safety component. Install it on the tank according to the manufacturer's instructions. Make sure the valve is connected to a discharge pipe that leads to a safe location, such as a floor drain. This way, if the pressure in the tank exceeds the safe limit, the valve will release the excess pressure and prevent damage to the tank.
Step 5: Install the Sensors and Gauges
Install the Liquid Level Sensor in the tank to monitor the water level. Connect it to a control panel or monitoring system if required. Install the Temperature Transmitter to keep an eye on the water temperature. Finally, install the Water Pump Pressure Gauge on the tank to measure the pressure.
Step 6: Prime the System
Once all the connections are made, it's time to prime the system. Open the main water supply valve and let water fill the tank and the pipes. This will remove any air from the system. Keep an eye on the pressure gauge and make sure the pressure builds up gradually.


Step 7: Test the System
After priming, test the water pump pressure tank system. Turn on the water pump and check for any leaks at the connections. Monitor the pressure gauge to ensure that the pressure is within the desired range. Open faucets on different floors of the building to check the water pressure and flow. Make any necessary adjustments to the air pressure in the tank or the settings of the water pump.
Maintenance Tips
- Regular Inspections: Check the tank and its connections regularly for any signs of leaks, corrosion, or damage.
- Air Pressure Check: Periodically check the air pressure in the tank and adjust it as needed.
- Clean the Tank: Over time, sediment can build up in the tank. Drain and clean the tank every few years to maintain its performance.
Conclusion
Installing a water pump pressure tank in a multi - story building is a bit of a process, but with the right tools, materials, and steps, you can ensure a reliable water supply with consistent pressure. If you're in the market for a high - quality water pump pressure tank or any of the accessories mentioned in this blog, don't hesitate to reach out. We're here to help you find the best solutions for your building's water needs. Whether you have questions about installation, sizing, or maintenance, our team of experts is ready to assist.
References
- Water Systems Council. "Understanding Well Pressure Tanks."
- Pump & Well Systems Magazine. Various articles on water pump pressure tank installation and maintenance.