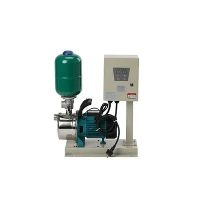
As a trusted supplier of LCD Pump Pressure Switches, I understand the importance of ensuring the functionality of these critical components. In this blog post, I'll share a comprehensive guide on how to test the functionality of an LCD Pump Pressure Switch, covering everything from basic principles to detailed testing procedures.
Understanding the Basics of LCD Pump Pressure Switches
Before diving into the testing process, it's essential to have a clear understanding of what an LCD Pump Pressure Switch is and how it works. An LCD Pump Pressure Switch is a device that monitors the pressure in a pumping system and controls the operation of the pump based on pre - set pressure levels. The LCD display provides real - time information about the pressure, making it easier for users to monitor and adjust the system.
The switch typically consists of a pressure sensor, an electronic control unit, and an LCD display. The pressure sensor measures the pressure in the system, and the control unit processes this information and determines whether to turn the pump on or off. The LCD display shows the current pressure reading and may also display other relevant information such as the set - point pressures.
Pre - testing Preparations
Safety First
Before starting any testing, it's crucial to ensure safety. Make sure the pump is turned off and disconnected from the power source to avoid any electrical hazards. Wear appropriate safety gear, such as gloves and safety glasses.
Gather the Necessary Tools
You will need a few tools for the testing process, including a pressure gauge, a multimeter, and a set of wrenches. The pressure gauge will be used to measure the actual pressure in the system, while the multimeter will be used to check the electrical connections and the functionality of the switch.
Check the Switch Installation
Inspect the installation of the LCD Pump Pressure Switch to ensure it is properly installed. Check for any loose connections, damaged wires, or signs of leakage. Make sure the switch is mounted in a location where it can accurately measure the pressure in the system.
Testing the Pressure Sensor
Step 1: Connect the Pressure Gauge
Connect a reliable pressure gauge to the system at a point close to the pressure switch. This will allow you to compare the pressure reading on the gauge with the reading on the LCD display of the pressure switch.
Step 2: Apply Pressure
Gradually increase the pressure in the system using a pump or other pressure - generating device. As you increase the pressure, observe the reading on the pressure gauge and the LCD display of the pressure switch. The two readings should be relatively close. If there is a significant difference, it may indicate a problem with the pressure sensor.
Step 3: Check for Hysteresis
Hysteresis is the difference between the pressure at which the switch turns on and the pressure at which it turns off. To check for hysteresis, gradually increase the pressure until the switch turns on. Note the pressure reading. Then, gradually decrease the pressure until the switch turns off and note the pressure reading. The difference between these two readings should be within the specified hysteresis range for the switch.
Testing the Electronic Control Unit
Step 1: Check the Power Supply
Use a multimeter to check the power supply to the pressure switch. Make sure the switch is receiving the correct voltage. If the voltage is too low or too high, it can affect the functionality of the switch.
Step 2: Check the Electrical Connections
Inspect the electrical connections of the switch. Look for any loose or corroded connections. Use the multimeter to check the continuity of the wires. A break in the continuity can cause the switch to malfunction.
Step 3: Test the Control Logic
To test the control logic of the switch, set the pressure set - points on the switch. Then, gradually increase and decrease the pressure in the system and observe whether the switch turns the pump on and off at the correct pressure levels. If the switch does not operate as expected, there may be a problem with the control logic.


Testing the LCD Display
Step 1: Check for Display Errors
Turn on the switch and check the LCD display for any errors or abnormal readings. The display should show the current pressure reading clearly and without any flickering or distortion.
Step 2: Check the Backlight
If the LCD display has a backlight, check whether it is working properly. A malfunctioning backlight can make it difficult to read the display.
Step 3: Check the Menu Functions
If the switch has menu functions, test them to ensure they are working correctly. Navigate through the menu and check if you can set the pressure set - points, adjust other parameters, and view the historical data (if available).
Troubleshooting Common Issues
Inaccurate Pressure Readings
If the pressure reading on the LCD display does not match the reading on the pressure gauge, it could be due to a faulty pressure sensor. Check the sensor for any damage or malfunction. You may need to replace the sensor if it is defective.
Switch Not Turning On or Off
If the switch does not turn the pump on or off at the correct pressure levels, it could be due to a problem with the control logic or the electrical connections. Check the control unit and the electrical connections for any issues. You may need to recalibrate the switch or replace the control unit if necessary.
Display Issues
If the LCD display has problems such as flickering, distortion, or no display at all, it could be due to a problem with the display itself or the power supply to the display. Check the power supply and the display connections. You may need to replace the display if it is defective.
Conclusion
Testing the functionality of an LCD Pump Pressure Switch is a crucial step in ensuring the proper operation of a pumping system. By following the steps outlined in this guide, you can effectively test the pressure sensor, the electronic control unit, and the LCD display of the switch. If you encounter any issues during the testing process, don't hesitate to seek professional help.
As a leading supplier of LCD Pump Pressure Switches, we offer high - quality products that are designed to meet the needs of various applications. Our Water Pump Pressure Controller with CE TUV Certificate and High Quality Water Pump Controller are reliable and efficient solutions for your pumping systems. We also provide Factory Water Pump Switch that are manufactured to the highest standards.
If you are interested in purchasing our LCD Pump Pressure Switches or have any questions about testing or using these products, please feel free to contact us for procurement and further discussions.
References
- "Pump Pressure Switch Handbook" - A comprehensive guide on pump pressure switches and their operation.
- Manufacturer's manuals for LCD Pump Pressure Switches, which provide detailed information on installation, testing, and troubleshooting.