Replacing a water pump pressure controller is a task that many homeowners and professionals may need to undertake at some point. As a trusted supplier of water pump pressure controllers, I've seen firsthand the importance of a properly functioning controller in maintaining an efficient water pumping system. In this blog post, I'll guide you through the process of replacing a water pump pressure controller, sharing insights from my experience in the industry.
Understanding the Water Pump Pressure Controller
Before we dive into the replacement process, it's essential to understand what a water pump pressure controller does. A water pump pressure controller is a device that monitors the pressure in a water system and controls the operation of the water pump accordingly. It ensures that the pump turns on when the pressure drops below a certain level (the cut - in pressure) and turns off when the pressure reaches a higher level (the cut - out pressure). This helps maintain a consistent water pressure throughout the system.
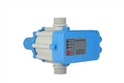
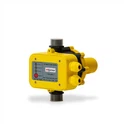
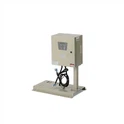
We offer a variety of water pump pressure controllers, such as the 24V DC Water Pump Switch, which is ideal for low - voltage applications, the Wide Voltage Water Pump Controller that can handle a range of input voltages, and the Automatic Pump Pressure Switch for fully automated operation.
Signs That You Need to Replace Your Water Pump Pressure Controller
There are several signs that indicate your water pump pressure controller may need to be replaced:
- Inconsistent Water Pressure: If you notice that the water pressure in your faucets or appliances is fluctuating, it could be a sign that the pressure controller is not functioning correctly.
- Pump Running Continuously: A controller that fails to turn off the pump when the desired pressure is reached can cause the pump to run continuously, leading to increased energy consumption and potential pump damage.
- Noisy Pump Operation: Unusual noises from the pump may indicate that the pressure controller is not regulating the pump's operation properly.
- Frequent On - Off Cycling: If the pump is turning on and off more frequently than normal, it can put additional stress on the pump and other components of the system.
Tools and Materials You'll Need
Before you start replacing the water pump pressure controller, gather the following tools and materials:
- Wrenches: A set of adjustable wrenches or pipe wrenches will be needed to disconnect and connect the pipes.
- Screwdriver: A Phillips or flat - head screwdriver may be required to remove the cover of the pressure controller and disconnect electrical connections.
- New Pressure Controller: Make sure you have the correct replacement pressure controller for your water pump system. You can choose from our wide range of products to find the one that suits your needs.
- Sealant Tape: This is used to create a watertight seal when connecting the pipes.
- Electrical Tape: To insulate electrical connections.
Step - by - Step Replacement Process
Step 1: Turn Off the Power
The first and most important step is to turn off the power to the water pump. Locate the circuit breaker or fuse that controls the pump and switch it off. This will prevent any electrical accidents during the replacement process.
Step 2: Release the Pressure
Next, you need to release the pressure in the water system. Open a faucet or a valve at the highest point in the system to allow the water to drain out. This will reduce the pressure and make it safer to work on the pressure controller.
Step 3: Disconnect the Electrical Connections
Using a screwdriver, carefully remove the cover of the old pressure controller. You'll see several electrical wires connected to the controller. Take note of how the wires are connected, or take a picture for reference. Then, disconnect the wires from the old controller. Make sure to use electrical tape to insulate the exposed wires to prevent any short - circuits.
Step 4: Disconnect the Pipes
Use a wrench to loosen the nuts or fittings that connect the pressure controller to the water pipes. Be prepared for some water to spill out as you disconnect the pipes. Place a bucket or a towel underneath to catch the water.
Step 5: Remove the Old Pressure Controller
Once the electrical connections and pipes are disconnected, you can remove the old pressure controller from its mounting bracket. Set the old controller aside.
Step 6: Install the New Pressure Controller
Take the new pressure controller and mount it in the same location as the old one. Make sure it is securely fastened to the mounting bracket. Then, connect the water pipes to the new controller. Apply sealant tape to the threads of the pipes before making the connections to ensure a watertight seal. Use a wrench to tighten the nuts or fittings.
Step 7: Connect the Electrical Wires
Refer to your notes or the picture you took earlier to connect the electrical wires to the new pressure controller. Make sure the connections are tight and secure. Once the wires are connected, replace the cover of the pressure controller.
Step 8: Turn On the Power and Check for Leaks
After the new pressure controller is installed and all the connections are made, turn on the power to the water pump. Check for any leaks around the pipe connections and electrical connections. If you notice any leaks, turn off the power and tighten the connections as needed.
Step 9: Adjust the Pressure Settings
Most water pump pressure controllers allow you to adjust the cut - in and cut - out pressure settings. Refer to the manufacturer's instructions to set the desired pressure levels for your water system. This may require the use of a pressure gauge to accurately measure the pressure.
Tips for a Successful Replacement
- Read the Manual: Before starting the replacement process, carefully read the manual that comes with the new pressure controller. It will provide specific instructions and safety guidelines.
- Take Your Time: Replacing a water pump pressure controller is not a race. Take your time to ensure that all the connections are made correctly and that the pressure settings are adjusted properly.
- Test the System: After the replacement, run the water pump for a few minutes and check the water pressure at different faucets and appliances. Make sure the pressure is consistent and that the pump is operating correctly.
Conclusion
Replacing a water pump pressure controller can seem like a daunting task, but with the right tools, materials, and knowledge, it can be done successfully. As a supplier of high - quality water pump pressure controllers, we are committed to providing you with the products and support you need to keep your water pumping system running smoothly.


If you have any questions about replacing a water pump pressure controller or if you're interested in purchasing a new controller, please don't hesitate to contact us for a purchase negotiation. We have a team of experts who can assist you in choosing the right product for your specific needs.
References
- "Water Pump Systems: Operation and Maintenance" - A comprehensive guide on water pump systems.
- Manufacturer's manuals for various water pump pressure controllers.