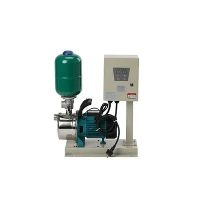
Installing a water pump pressure sensor is a crucial step for ensuring the efficient and safe operation of your water pump system. As a reputable water pump pressure sensor supplier, I'm here to guide you through the process, offering insights and practical tips to make your installation a success.
Understanding the Basics of a Water Pump Pressure Sensor
Before diving into the installation process, it's essential to understand what a water pump pressure sensor does. A water pump pressure sensor is a device that measures the pressure of the water in the pump system. It sends this information to the pump controller, which then adjusts the pump's operation based on the pressure readings. This ensures that the water pressure remains within the desired range, preventing issues such as over - pressurization or under - pressurization.
Tools and Materials You'll Need
- Water Pump Pressure Sensor: Of course, you'll need the sensor itself. Make sure to choose a sensor that is compatible with your water pump system in terms of pressure range, electrical specifications, and connection type.
- Wrenches: Appropriate wrenches for tightening the sensor connections. The size will depend on the fittings of your pump system.
- Teflon Tape: This is used to create a tight seal on threaded connections, preventing leaks.
- Multimeter: To test the electrical connections and ensure that the sensor is functioning correctly.
- Screwdriver: For any electrical or mounting screws that may be required.
Step - by - Step Installation Guide
Step 1: Turn Off the Power
Safety first! Before you start any work on your water pump system, turn off the power supply to the pump. This will prevent any electrical shocks or damage to the pump and sensor during the installation process.
Step 2: Locate the Installation Point
The water pump pressure sensor should be installed in a location where it can accurately measure the water pressure. Typically, this is near the outlet of the pump or in the main water line. Make sure the location is easily accessible for future maintenance and testing.
Step 3: Prepare the Connection Points
If the installation point has threaded connections, clean the threads thoroughly. Then, wrap Teflon tape around the male threads in a clockwise direction. This will help create a watertight seal when you install the sensor.
Step 4: Install the Sensor
Carefully screw the water pump pressure sensor into the prepared connection point. Use the appropriate wrench to tighten the sensor, but be careful not to over - tighten, as this could damage the sensor or the connection.
Step 5: Make Electrical Connections
Refer to the sensor's wiring diagram to make the electrical connections. Connect the power wires and the signal wires to the appropriate terminals on the sensor. Use a screwdriver to secure the wires tightly. After making the connections, use a multimeter to test for continuity and ensure that there are no short circuits.
Step 6: Check for Leaks
Once the sensor is installed and the electrical connections are made, turn on the water supply to the pump. Check the connection points for any signs of leaks. If you notice a leak, turn off the water supply and tighten the connections further or re - apply the Teflon tape.


Step 7: Test the Sensor
Turn on the power to the pump and let the system run. Use the multimeter to measure the output signal of the sensor. Compare the readings with the specifications provided by the sensor manufacturer. If the readings are within the expected range, the sensor is working correctly.
Additional Accessories for Your Water Pump System
In addition to the water pump pressure sensor, there are other accessories that can enhance the performance and reliability of your water pump system. For example, a Water Pump Float Switch can be used to automatically turn the pump on and off based on the water level. This is particularly useful in applications such as sump pumps or water storage tanks.
Another useful accessory is the Industrial Plastic Expansion Tank. This tank helps to absorb the pressure fluctuations in the water system, reducing the stress on the pump and other components.
If you need a more advanced pressure measurement solution, the VLF - 516 Pressure Transmitter is a great option. It provides accurate and reliable pressure measurements, making it suitable for industrial applications.
Troubleshooting Tips
- No Pressure Reading: If the sensor is not providing a pressure reading, check the electrical connections first. Make sure the power is on and the wires are properly connected. Also, check for any blockages in the pressure port of the sensor.
- Inaccurate Readings: Inaccurate readings could be due to a faulty sensor or incorrect installation. Check the calibration of the sensor and make sure it is installed in the correct location.
- Leaking Connections: If you notice leaks at the connection points, tighten the connections or re - apply the Teflon tape. If the leak persists, there may be a damaged fitting that needs to be replaced.
Conclusion
Installing a water pump pressure sensor is a relatively straightforward process if you follow the steps outlined above. As a water pump pressure sensor supplier, we are committed to providing high - quality products and excellent customer support. Whether you are a DIY enthusiast or a professional installer, we have the right sensor for your needs.
If you are interested in purchasing a water pump pressure sensor or any of the accessories mentioned in this blog, we invite you to contact us for more information and to discuss your specific requirements. Our team of experts is ready to assist you in finding the best solution for your water pump system.
References
- "Water Pump Systems: Installation and Maintenance Guide", Industry Standards Publication
- Manufacturer's manuals for water pump pressure sensors and related accessories.