Adjusting the cut-in and cut-out pressure of a water pump pressure tank is a crucial task that ensures the efficient and reliable operation of your water supply system. As a trusted supplier of Water Pump Pressure Tanks, I understand the importance of getting these settings right. In this blog post, I'll guide you through the process, providing you with the knowledge and steps needed to make these adjustments effectively.
Understanding Cut-In and Cut-Out Pressure
Before diving into the adjustment process, it's essential to understand what cut-in and cut-out pressures are. The cut-in pressure is the point at which the water pump turns on to refill the pressure tank. The cut-out pressure, on the other hand, is the pressure at which the pump turns off. These pressures are typically measured in pounds per square inch (PSI).
A well-adjusted pressure tank ensures a consistent water supply, prevents the pump from short cycling (turning on and off too frequently), and extends the lifespan of both the pump and the pressure tank.
Tools You'll Need
To adjust the cut-in and cut-out pressure of your water pump pressure tank, you'll need the following tools:
- A pressure gauge: This will help you accurately measure the pressure in the tank.
- A screwdriver: You'll use this to adjust the pressure switch.
- A tire pressure gauge: This can be used to check the air pressure in the tank's bladder (if it's a bladder-type tank).
Step-by-Step Guide to Adjusting Pressure
Step 1: Turn Off the Power
Before making any adjustments, it's crucial to turn off the power to the water pump. This will prevent any accidental starts and ensure your safety during the adjustment process.
Step 2: Check the Air Pressure in the Tank
If you have a bladder-type water pump pressure tank, it's important to check the air pressure in the bladder. The air pressure should be 2 PSI lower than the cut-in pressure. For example, if your cut-in pressure is set to 30 PSI, the air pressure in the bladder should be 28 PSI.
Use a tire pressure gauge to check the air pressure. If the pressure is too low, you can add air using an air compressor. If it's too high, you can release some air by pressing the valve stem.
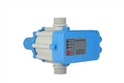
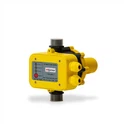
Step 3: Locate the Pressure Switch
The pressure switch is usually located near the water pump or the pressure tank. It's a small box with wires connected to it. The switch has two adjustment screws: one for the cut-in pressure and one for the cut-out pressure.
Step 4: Adjust the Cut-In Pressure
To adjust the cut-in pressure, locate the screw labeled "cut-in" or "CUT-IN." Turn the screw clockwise to increase the cut-in pressure or counterclockwise to decrease it. Make small adjustments and use the pressure gauge to monitor the pressure as you go.


For example, if you want to increase the cut-in pressure from 30 PSI to 35 PSI, turn the screw clockwise in small increments until the pressure gauge reads 35 PSI.
Step 5: Adjust the Cut-Out Pressure
Once you've adjusted the cut-in pressure, it's time to adjust the cut-out pressure. Locate the screw labeled "cut-out" or "CUT-OUT." Similar to the cut-in pressure adjustment, turn the screw clockwise to increase the cut-out pressure or counterclockwise to decrease it.
The difference between the cut-in and cut-out pressures is called the pressure differential. A common pressure differential is 20 PSI. So, if your cut-in pressure is 35 PSI, your cut-out pressure should be 55 PSI.
Step 6: Test the System
After making the adjustments, turn the power back on to the water pump. The pump should turn on at the cut-in pressure and turn off at the cut-out pressure. Use the pressure gauge to confirm that the pump is operating within the desired pressure range.
Troubleshooting
If you encounter any issues during the adjustment process, here are some common problems and solutions:
- Pump not turning on: Check the power supply to the pump and the pressure switch. Make sure the cut-in pressure is set correctly.
- Pump not turning off: Check the cut-out pressure adjustment. It may be set too high. Also, check for any leaks in the system that could be causing the pressure to drop.
- Short cycling: This could be due to a faulty pressure switch, a leak in the system, or incorrect pressure settings. Check the pressure switch and the system for leaks, and adjust the pressure settings if necessary.
Related Accessories
In addition to adjusting the cut-in and cut-out pressure, you may also want to consider using some accessories to enhance the performance of your water pump pressure tank. Here are some recommended accessories:
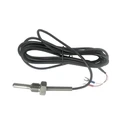
- Temperature Transmitter: This device can monitor the temperature of the water in the tank, helping you detect any potential issues.
- Stainless Steel Five-Way: This is a versatile fitting that can be used to connect multiple components in your water supply system.
- Protection Class IP68 Pressure Sensors: These sensors are designed to withstand harsh environments and provide accurate pressure measurements.
Contact Us for Procurement
If you're in the market for a new water pump pressure tank or any of the accessories mentioned above, I invite you to contact us for procurement. As a leading supplier, we offer high-quality products at competitive prices. Our team of experts is also available to provide you with technical support and guidance to ensure you get the right products for your needs.
References
- "Water Pump Pressure Tanks: A Comprehensive Guide." Plumbing Supply Magazine, Vol. 15, Issue 3, 2023.
- "Adjusting Pressure Switches on Water Pumps." Home Improvement Journal, Vol. 22, Issue 2, 2022.