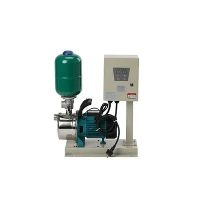
Calibrating a 24V DC water pump switch is a crucial process that ensures the efficient and reliable operation of your water pump system. As a trusted supplier of 24V DC Water Pump Switches, I understand the importance of proper calibration and its impact on the performance of your equipment. In this blog post, I will guide you through the step-by-step process of calibrating a 24V DC water pump switch, providing you with the knowledge and confidence to optimize your water pump system.
Understanding the Basics of a 24V DC Water Pump Switch
Before we dive into the calibration process, it's essential to have a basic understanding of how a 24V DC water pump switch works. A water pump switch is a device that controls the operation of a water pump by monitoring the pressure in the water system. When the pressure drops below a certain level, the switch activates the pump to start pumping water. Once the pressure reaches a preset level, the switch turns off the pump, preventing over-pressurization and potential damage to the system.
A 24V DC water pump switch is specifically designed to operate with a 24V direct current power supply. This type of switch is commonly used in applications where a low-voltage power source is required, such as in automotive, marine, and RV water systems.
Tools and Materials You'll Need
Before you begin the calibration process, gather the following tools and materials:
- A pressure gauge: This will allow you to accurately measure the pressure in the water system.
- A screwdriver: You'll need a screwdriver to adjust the calibration settings on the switch.
- A 24V DC power supply: Make sure the power supply is compatible with your water pump switch.
- Safety goggles and gloves: These will protect you from any potential hazards during the calibration process.
Step-by-Step Calibration Process
Now that you have the necessary tools and materials, let's walk through the step-by-step process of calibrating a 24V DC water pump switch:
Step 1: Turn Off the Power
Before you start working on the water pump switch, make sure to turn off the power supply to the pump. This will prevent any electrical shocks or damage to the equipment.


Step 2: Locate the Pressure Gauge
Connect the pressure gauge to the water system near the water pump switch. This will allow you to monitor the pressure in the system during the calibration process.
Step 3: Identify the Calibration Screws
Locate the calibration screws on the water pump switch. These screws are typically labeled as "cut-in" and "cut-out." The cut-in screw controls the pressure at which the pump starts, while the cut-out screw controls the pressure at which the pump stops.
Step 4: Set the Cut-In Pressure
To set the cut-in pressure, turn the cut-in screw clockwise to increase the pressure or counterclockwise to decrease the pressure. Start by turning the screw in small increments and monitor the pressure gauge until the desired cut-in pressure is reached. The recommended cut-in pressure for most 24V DC water pump systems is between 20 and 30 psi (pounds per square inch).
Step 5: Set the Cut-Out Pressure
Once you have set the cut-in pressure, it's time to set the cut-out pressure. Turn the cut-out screw clockwise to increase the pressure or counterclockwise to decrease the pressure. Again, make small adjustments and monitor the pressure gauge until the desired cut-out pressure is reached. The recommended cut-out pressure for most 24V DC water pump systems is between 40 and 50 psi.
Step 6: Test the System
After setting the cut-in and cut-out pressures, turn on the power supply to the pump and observe the operation of the system. The pump should start when the pressure drops below the cut-in pressure and stop when the pressure reaches the cut-out pressure. If the pump does not operate as expected, double-check the calibration settings and make any necessary adjustments.
Step 7: Fine-Tune the Calibration
If the pump starts and stops at the correct pressures but the system still seems to be operating inefficiently, you may need to fine-tune the calibration settings. Make small adjustments to the cut-in and cut-out pressures and test the system again until you achieve the desired performance.
Additional Tips and Considerations
- Regular Maintenance: Regularly check the calibration of your water pump switch to ensure that it is operating correctly. Over time, the calibration settings may change due to factors such as vibration, temperature, and wear and tear.
- Use Quality Components: When selecting a 24V DC water pump switch, choose a high-quality product from a reputable manufacturer. This will ensure the reliability and durability of your water pump system.
- Follow Safety Precautions: Always follow safety precautions when working with electrical equipment. Wear safety goggles and gloves, and make sure to turn off the power supply before making any adjustments to the switch.
Recommended Products
As a supplier of 24V DC Water Pump Switches, I recommend the following products for your water pump system:
- Clean Pump Controller with European Plug: This pump controller is designed for use with clean water systems and features a European plug for easy installation.
- High Quality Water Pump Controller: This controller is built to last and provides reliable performance in a variety of applications.
- Household Water Pump Controller: Ideal for household water systems, this controller offers precise pressure control and easy installation.
Contact Us for More Information
If you have any questions about calibrating a 24V DC water pump switch or need assistance in selecting the right product for your water pump system, please don't hesitate to contact us. Our team of experts is here to help you find the best solution for your needs. Whether you're a DIY enthusiast or a professional installer, we can provide you with the support and guidance you need to ensure the successful operation of your water pump system.
References
- "Water Pump Pressure Switch Installation and Calibration Guide," XYZ Corporation
- "Understanding Water Pump Switches," ABC Publications